Friday, April 12, 2024

Drivetrain Refresh

When I got the timing belts and oil cooler sorted, we noted vibration in the torque tube at around 3500rpms. The 944 S2 uses a torque tube that has a split lengthwise that was designed to reduce harmonics and vibration. The problem is that over time this can spread over time causing the bearings inside to not sit properly. The vibration wasn't terrible but it was a sign of things to come and rather than wait for failure, I prefer to just fix it the right way the first time. I picked up a used late generation 944 from @944Barn on IG and had it delivered to Black Sea R&D in Georgia to have it fully refurbished and have their four of the steel shielded super bearings fitted. These bearings are made in the USA and built to better quality than the OEM ones from the 80s. 
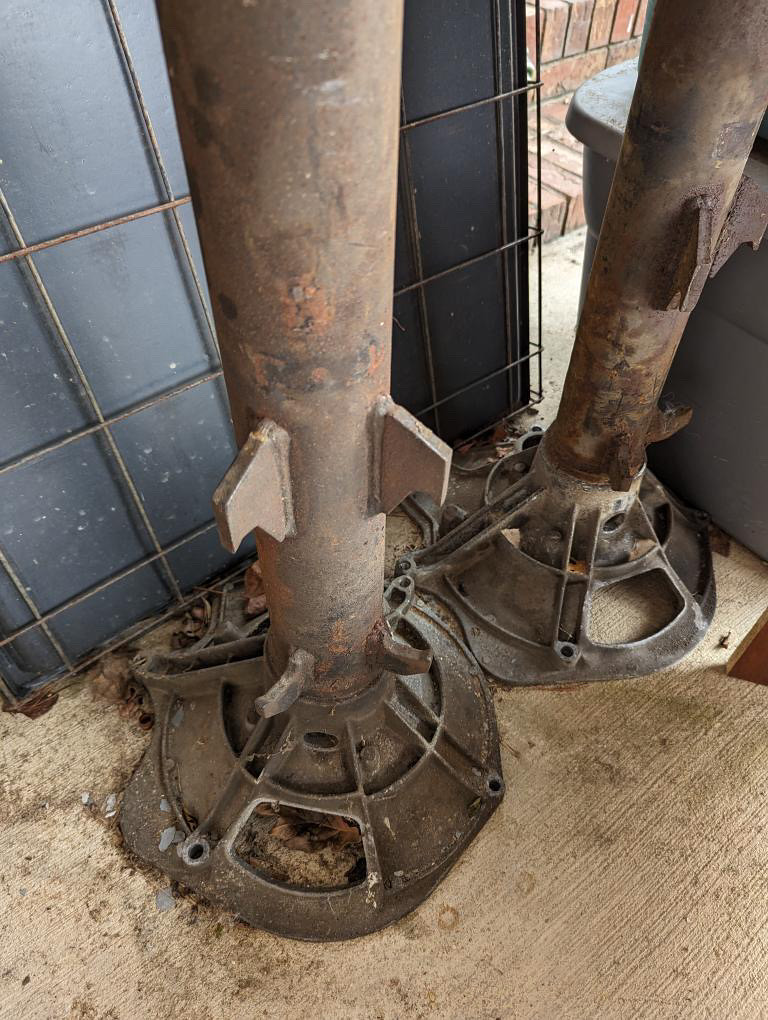
One of the used later gen torque tubes from 944Barn

Splines cleaned up

Steel shielded super bearings
 
Reassembled and powder coated

Since I was going to have the torque tube dropped anyway, it made sense to incorporate a number of normally labor intensive jobs as part of it to save on future labor. Looking at the previous owners' records the clutch was changed about a 13 years ago but the flywheel was only resurfaced not replaced. I ordered a brand new OEM clutch, flywheel, pressure plate and all associated hardware since it's almost a no brainer to do that now with it exposed as part of the torque tube replacement. With the clutch out it also made sense to replace the rear main seal. 

New Rear Main Seal

New clutch, flywheel and pressure plate in

Newly refurbished torque tube installed

The foam that goes under the shifter for sound absorption had already started to crumble over the years so I had that replaced too since you can only get to it with the torque tube removed. Glad I did that since the old foam had definitely seen better days.
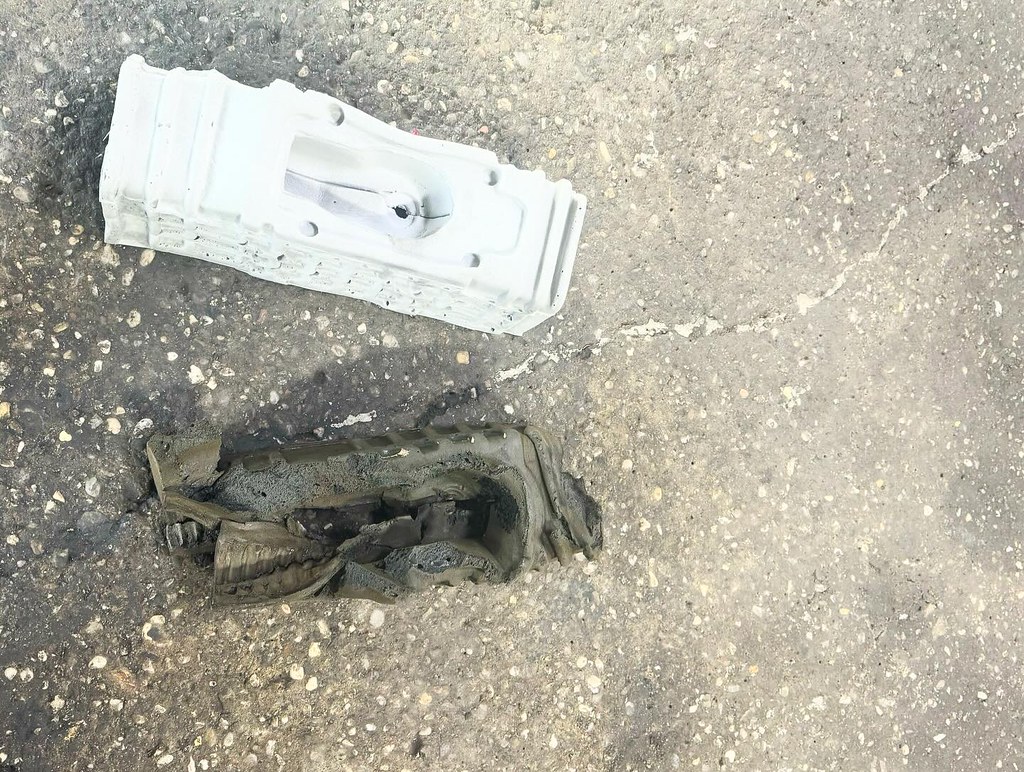
New foam (top) vs old foam (bottom)

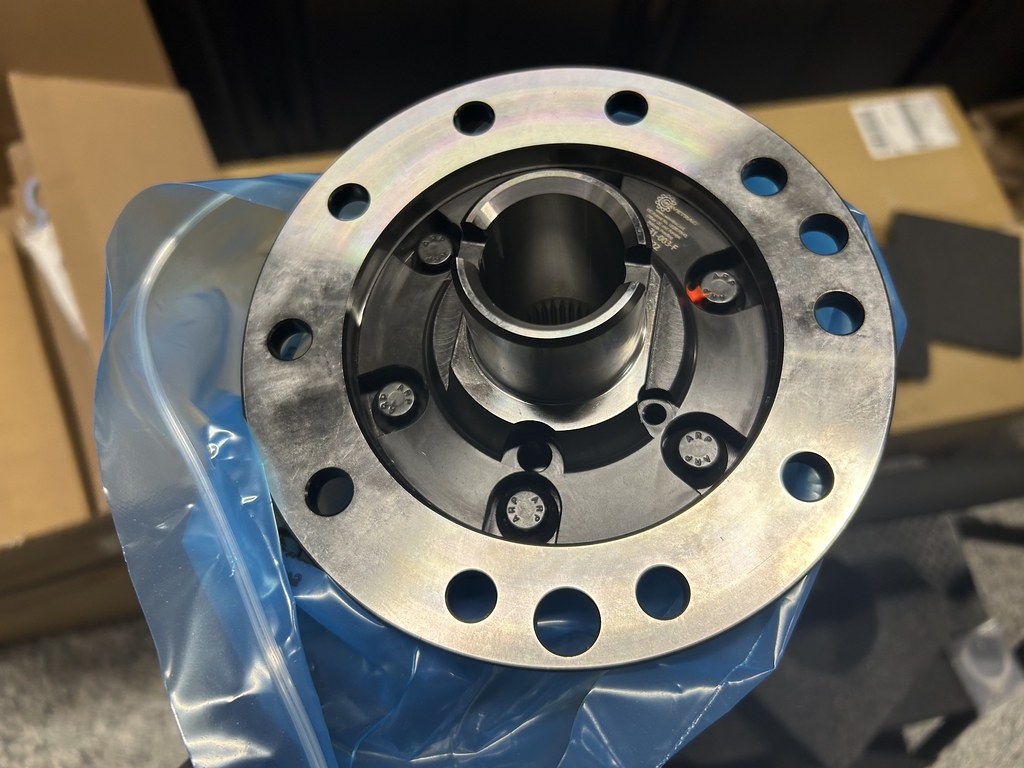
Last but not least, I got a Wavetrac LSD installed with new bearings into the transmission and also put in a fresh new OEM transmission mount. I've had good experience with the Wavetrac LSD in my 911 so I figured for the price and performance, this was going to be a nice little upgrade.

Wavetrac LSD

Wavetrac LSD


Transmission back together with WaveTrac LSD and
Motul SAE 75W90 gear oil

New OEM transmission mount

All these changes really brought the car to the level of "restoration" I wanted for this car. It's been well take care of and driven over the years and really needed some proper investment and effort to make it as good as it was when it was new. It feels transformed from the day I picked it up and I'm definitely very happy with the outcome.

Super big thanks to Marcello at Hybrid Motors for getting this turned our super quick and making sure everything was done right including addressing a few other small leaks we uncovered as part of this work.


Maintenance Update:

Mileage: 96,788

- New OEM Transmission Mount
- New OEM shifter sound absorber foam
- New OEM clutch
- New OEM Flywheel + new bolts
- New OEM Pressure plate + new bolts
- New OEM pilot bearing and release bearing
- New OEM clutch fork shaft
- New OEM needle bearings for clutch fork
- New OEM guide tube for release bearing
- New clutch bellhousing, torque tube, transmission bolts 
- New OEM rear main seal
- Remanufactured late gen torque tube with 4 stainless shielded super bearings by Black Sea R&D
- Wavetrac LSD (40.309.170WK)
- 3 quarts Motul 75W90 Gear Oil


Monday, April 8, 2024

Mr Sideways x Sakebomb Garage High Performance Radiator

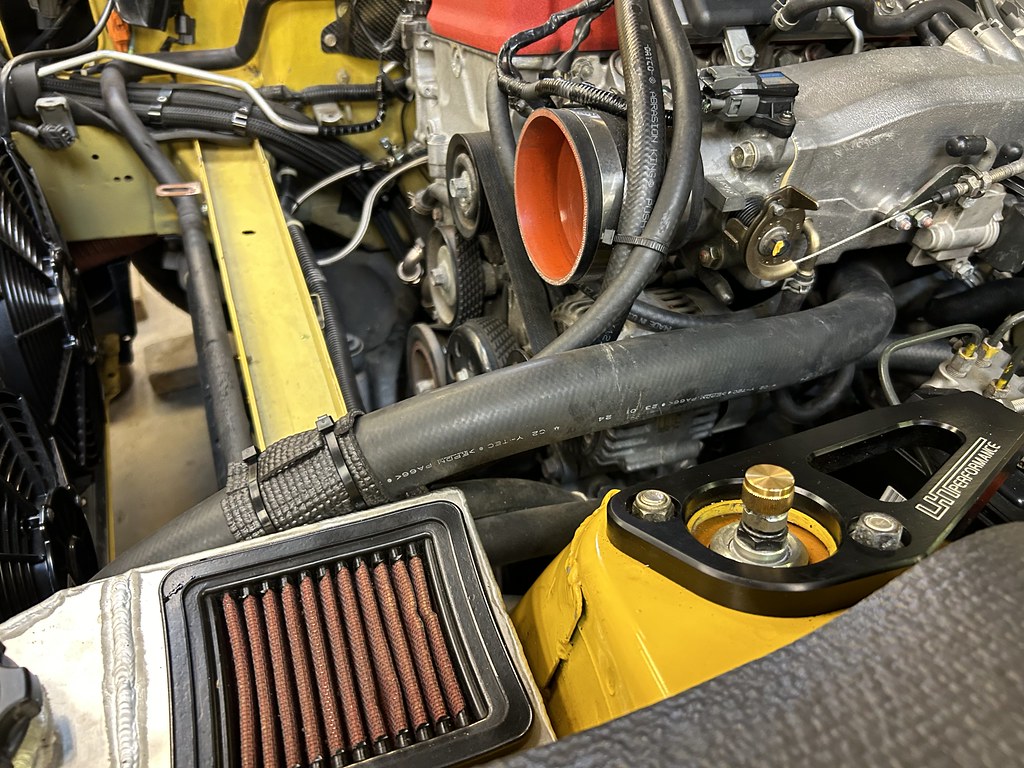
I've been meaning to improve the cooling on my car for some time now and picked a Mr Sideways x Sakebomb Garage high performance dual pass radiator with 12 and 10 inch low profile SPAL fans. It's supposed to be a bit more efficient than my Koyo radiator with much quieter fans than my old FAL setup. I also wanted to go back to OEM rubber radiator hoses from the Samco Silicone hoses I had before due to the coolant smell you can sometimes get from coolant that permeates through them.

Mr Sideways x SBG radiator setup

First order of business was to drain the coolant of course, then removing the hoses and old radiator setup from the car. 

Radiator drained
Old radiator removed

The  fan switch had to get moved over to the new radiator.. For some reason my existing fan switch didn't have an O-ring and I didn't have a new one but thankfully SJF had some O-ring spares that worked. Getting the OEM hoses in was tight but not too terrible but after we put the new radiator in the car we ran into our first big-ish problem. My combo catch can / coolant overflow required us to move the AC line closer to the inside several years ago and this was now exactly where the upper coolant hose needed to route. We had to push the AC line down some more and not route the coolant hose through the bracket that normally supports it but instead just support it with the AN fittings going to the oil catch can. 

New radiator in and hoses attached

Upper radiator hose supported by the catch can fittings

SJF uses a vacuum filler to vacuum the entire coolant system so we know the seals are good then about 1.5 Gallons of Honda Type-2 coolant was added.

Coolant getting sucked in by the vacuum

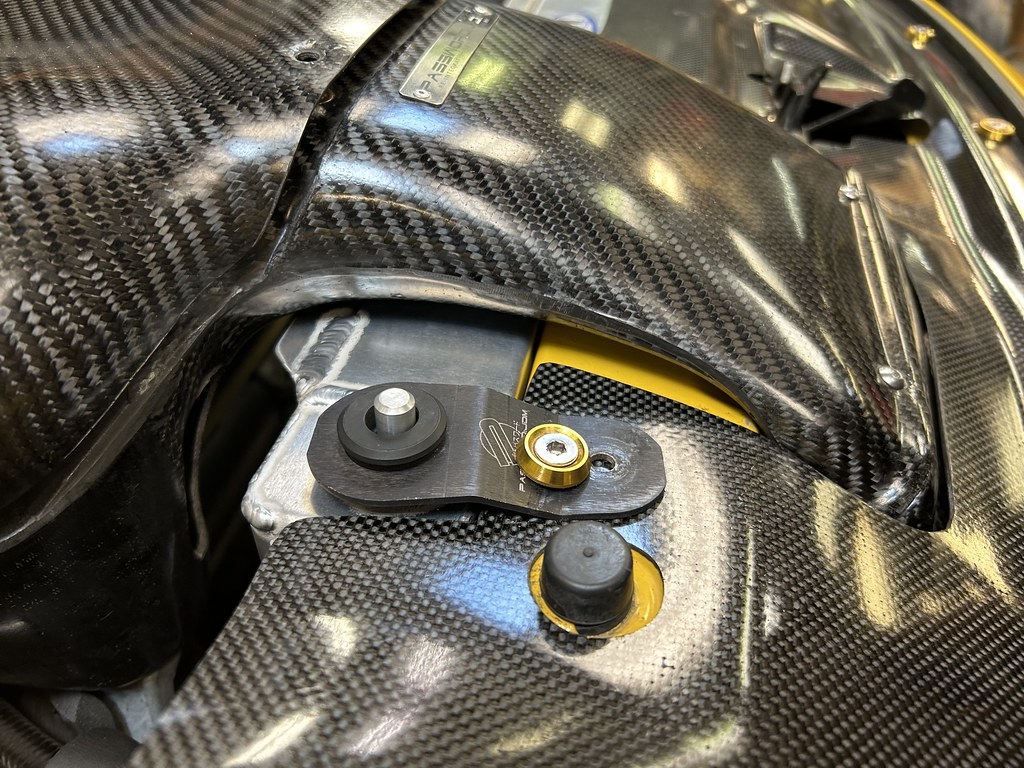
Once we got that filled, the old connectors from the previous radiator were cut and transferred and soldered to the new radiator since I have different radiator connectors from stock. The next problem were the radiator stays. The location of the radiator posts don't line up with the factory location so on the driver side, a 1/4-20 nutsert had to be installed into one of the existing holes and new holes drilled in both my radiator stay and carbon fiber cooling plate. We also had to drill new holes on the passenger side radiator stay so it could be bolted in. Additional carbin fiber had to be cut off to accommodate the new location of the coolant cap. For a radiator that's built for an S2000 you'd think they would have this sorted and not require additional fabrication.

Additional hold in passenger side radiator stay

Nutsert for driver side radiator stay

Driver side radiator stay installed

Once that was sorted we could the intake back in and make sure the system was operating as it should.

Everything back in place
 
Getting the car hot and cycled

Maintenance Update:

Mileage: 65,241

- New Mr Sideways x SBG high performance radiator
- 12 inch and 10 inch SPAL low-profile fans
- New OEM rubber radiator hoses
- 1.5 gallons (approx) of Honda Type-2 Coolant

Saturday, March 30, 2024

New Injectors and Rear Calipers

Bumblestook is 22 years old now and it's still got the original injectors. I doubt the spray pattern is still good so I had originally though about getting the injectors bench flow tested and cleaned. However, I was able to source some brand new Honda S2000 injectors from Japan and I've said to myself that for as long as I can source new parts from Honda, I'll do that and hoard my old parts as spares. These injectors are impossible to find from the US but I was able to source them directly from Japan for less than what dealers here charge for them. 

Fresh OEM Honda S2000 Injectors
New injectors on the fuel rail

Fuel rail going back in

Last year I also noticed that my rear calipers were starting to bind a little especially on initial laps of any track day. They've seen better days and probably could use a rebuild but same story here, I was able to source some brand new rear calipers from Honda and that seemed like the smarter thing to do so I could keep the old ones as spares.

1 of 2 new rear calipers

Driver side rear caliper installed

Passenger side rear caliper installed

Of course if you're replacing calipers you're going to have to bleed the brakes so I went ahead with a flush with some fresh Motul RBF660 brake fluid.

Fresh brake fluid

Thanks to SJF for getting this done for me today.

Maintenance Update:

Mileage: 65,179

- 2 new rear OEM calipers
- 4 new OEM injectors 06164-PCX-010
- Motul RBF 660 brake fluid flush

Monday, March 25, 2024

Voltex Swan Neck and Houndstooth Interior

I ordered a 1550mm Voltex Type 7 Swan Neck wing for the S2000 well over a year ago and it finally arrived over the winter. I got a spare trunk to install it on and dropped it off with Eric at K2 Autobody so he could paint it. While it was there I decided to also repaint the rear bumper and rear over fenders which had suffered some pain peeling and pitting over the years. Unfortunately the paint pigments have changed over the past 7 years so even though they have the formula for my paint (Rio Yellow Pearl), it doesn't actually match so they had to adjust the formula to try and match it as best they could. It's a good match but it's still a tad lighter compared to the rest of the car but I think it still looks fine. 

New Voltex wing installed
Reinforcement plates riveted in place (1/8" rivets)

Another angle of the rear wing

While the body panels were out to get painted, I also dropped off the cushions for my Recaro Pole Positions and door panels to have to reupholstered. I had it done 7 years ago in yellow/black Tomcat pattern which is very JDM but I was never really super happy with it because the color was a bit too light. Last year I had the seats in my Cayman reupholstered to yellow/black houndstooth and not only did I really love the pattern but it was a better match to the Rio Yellow of the S2000 so I took this opportunity to have the S2000 interior redone as well.

Houndstooth reupholstered interior

Houndstooth reupholstered interior

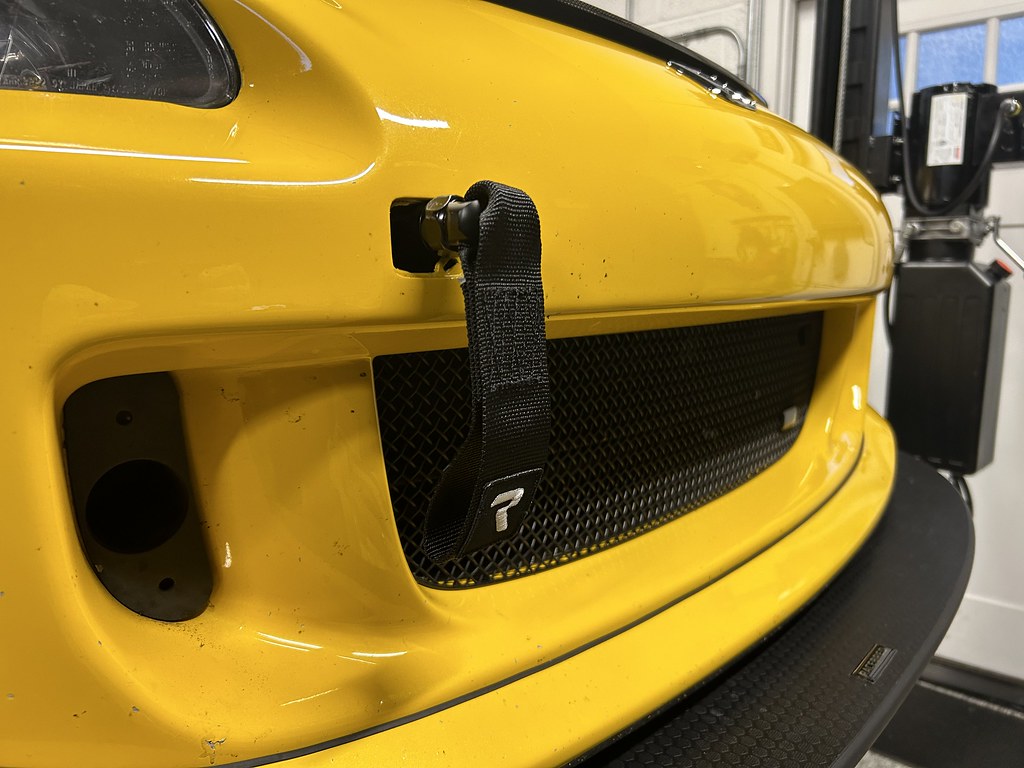
Since I removed the J's racing front tow hook as part of my front splitter install since the tow hook interfered with the proper mounting of the splitter mounts, I picked up a Raceseng tow strap instead and installed that.

Raceseng tow strap


Saturday, March 9, 2024

J&L Oil Air Separator

After discovering oil in the PCV when I had it replaced recently, I decided it might be a good idea to put a catch on the Jeep to prevent that stuff from getting back into the intake. I picked up a J&L Oil Air separator which was an easy enough install. Reviews seem pretty good. I'll see how much oil this catches at the next oil change. 

J&L Oil Air Separator installed

Hard line disconnected

Catch can plumbed in.

Friday, March 8, 2024

Racebred V2 Quick Release Splitter

In the end of 2022 I picked up a Racebred V2 Quick Release splitter for the s2000 just as I went to order my Voltex wing. I didn't want to install the splitter without the wing because of aero balance so I waited and since the wing took over a year to arrive, here I am now 15 months later installing the splitter.

Splitter installed

It's a pretty nice piece but the bracket is designed to go flush against the frame and those pieces are actually angled up slightly so if you install it out of the box the splitter is actually angled up a little which isn't what you want aerodynamically. I had to shim it using 2 x 3/8" fender washers at the front to get a slightly downward angle instead.

Now correctly angled
Removed center under tray and trimmed fender lines

The center under tray had to be removed and the fender liners trimmed so it wouldn't get in the way. While the splitter is "quick release", there are two bolts on each side holding it in place for added security so you need to remove those to pull the quick release pin. It's possible to do through the fender liner with the wheels removed but I wouldn't really call that "quick". 

Bumper reinstalled

It looks pretty decent and functional installed but because the CR lip isn't flat, there's a gap between the splitter and the bumper towards the center. This is not ideal from an aero perspective so I ordered their air dam to go with this. I'll likely have to remove the bumper again anyway since I noticed a but of the bottom part of the lip hits the splitter bracket so I'll have to trim that and I'm debating removing my J's racing tow hook since it's sandwiched right now between the frame and the bracket and I don't think that's ideal. 

Friday, March 1, 2024

Timing belts and fixing leaks

Looking back at the records, looks like the timing belts were last done 5 years ago. That's a "long" time for a 944 so that was on the top of the list of maintenance items I wanted to take care of. I also found no evidence of the motor mounts ever being replaced so I got a new set of OEM Porsche motor mounts. You want to stay OEM on the motor mounts because they are fluid filled and provide the right amount of damping. The cheaper aftermarket mounts die very quickly especially the one that sits closest to the header from the heat.

Service work done at Hybrid Motors

I dropped the car off with Marcelo at Hybrid Motors last week and they were able to turn the car around in less than a week. I had them source the timing belt, water pump and new rollers and while they were in there I also had them replace the motor mounts. Good thing I did as they were seized up there and worn pretty badly. They appear to be the originals from 1991 so they were long overdue. I also continue to see both an oil leak and power steering leak from the car before dropping it off so I had them take a look at it. The power steering leak was coming from the hose going out of the power steering reservoir. This is a common failure point so a new hose was installed.

New power steering reservoir hose

For the oil leak, it turns out the factory oil cooler was leaking. We could've tried just replacing some seals but instead I had them acquire and replace the entire oil cooler to make sure everything was just new and perfect. If the outer seals are going, you don't know what else could fail internally and cause coolant and oil to mix. 

New OEM oil cooler installed

Another common wear item is the cam chain guide. I had them replace that as well along with a new valve cover gasket to make sure I don't get any leaks after that work gets done. This is nice preventative maintenance as cam chain guides are made of some kind of hard plastic that can disintegrate over time. Not something I want in the engine. 

Old cam chain guide looking very tired but intact

The engine is humming along smoothly now with no leaks to concern myself about. I know I'm going a little overboard but I do treat every car I own as something I might own for a very long time so I try to make sure they are all brought up to proper maintenance rather than wait for things to fail. 

Old oil cooler

Old rollers and seals

Old motor mounts, timing belts, PS hose


Maintenance Update

Mileage: 96,660

- New OEM timing belts
- New OEM water pump
- New OEM timing belt rollers
- New OEM oil cooler
- New OEM valve cover gasket
- New OEM cam chain guide
- New OEM motor mounts
- New power steering reservoir hose